
Mithridatic vs Middle Imperial Roman
Mithridates is one of the exceptional characters that tried to stop the roman tide, like Hannibal, Pirrus, Decebalus or Ariovistus. He was not a renowned and successful general like the punic leader, but he was able for many years to fight Rome, and recover from defeats. Not an easy task, looking at the roman leaders he faced.
Mithridatic army is very easy to morph if the player owns an hellenistic or late republican ronan army. Like Carthaginians, it relied on mercenaries and men from many nations. I organized my army list to field a large number of imitation legionaries. This is one of the most difficult armies I have ever used. My list can be seen here.
As a rule of thumb, the more different elements you mix in an army, the more effective is if properly used, the more difficult is to manage and the bigger the disaster is when coordination and combined arms are lacking. Well, I can say this is a sort of Stradivari list, with irregular generals, three different troop types in each corps, one of them clumsy, and two corps out of three having impetous troops.
My opponent tested a Middle Imperial Roman army, quite small and with many elite troops
I attacked and this was the battlefield with the armies deployed. My opponent set up two rocky hills to bolster his defence line and hamper my cavalry. I had two options, flank march one corps or try a frontal assault. I choosed the second option because I wanted to see the army performance in a straight fight.
My plan was to attach echeloned on the right, with skirmishers assaulting the village and manouvering around it. The main assault would be executed by IWbO and IKnF supporting each other against enemy Bd. BdS corps was the toughest, and I hoped to beat it piercing the flank of the pretorian line, through the Bua and the RAxO.
My left flank was to be refused, with mounted ready to engage any enemy troops should leave the rough going protection.

The Roman had very good pip, and advanced the ArtF over the crest of the rocky hill, redeploying also the BdS, BdX and KnX reserve. The pretorian corps had the middle pip dice, with the cavalry reserve having the lowest one.

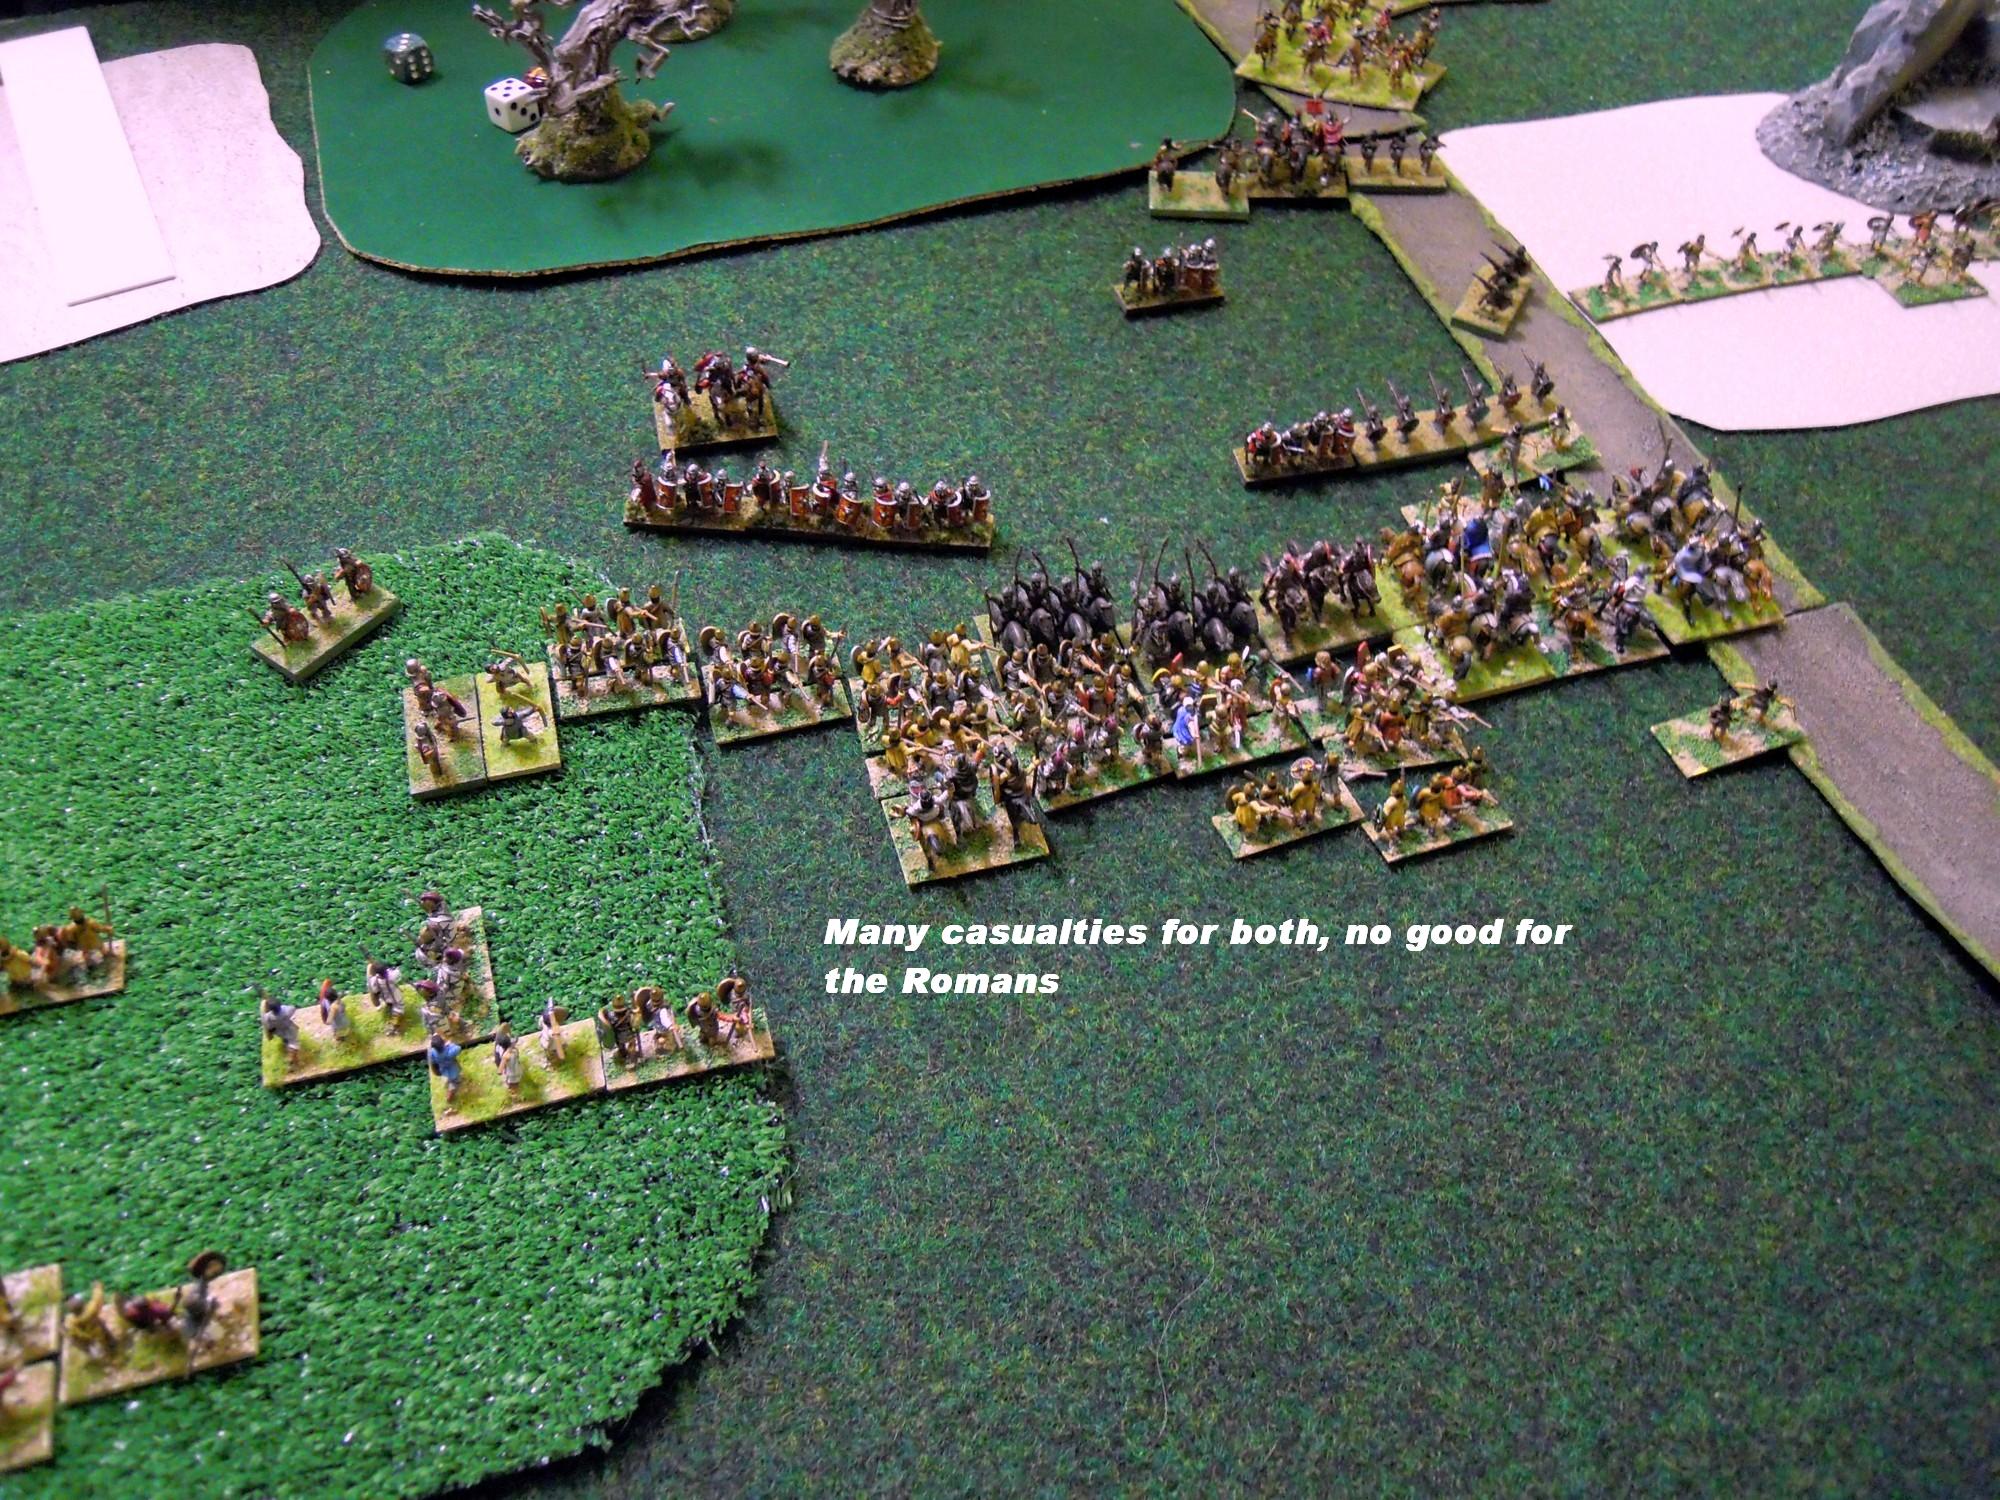
This is the start of Mithridatic attack. RAxS from left corps close supported the imitation legionaries and tried to avoid the roman artillery fire closing to enemy. Romans enjoyed up hill advantage, but I had two lines of troops, and quality superiority in a portion of the line, so I thought I had a fair chance to push back the enemy.
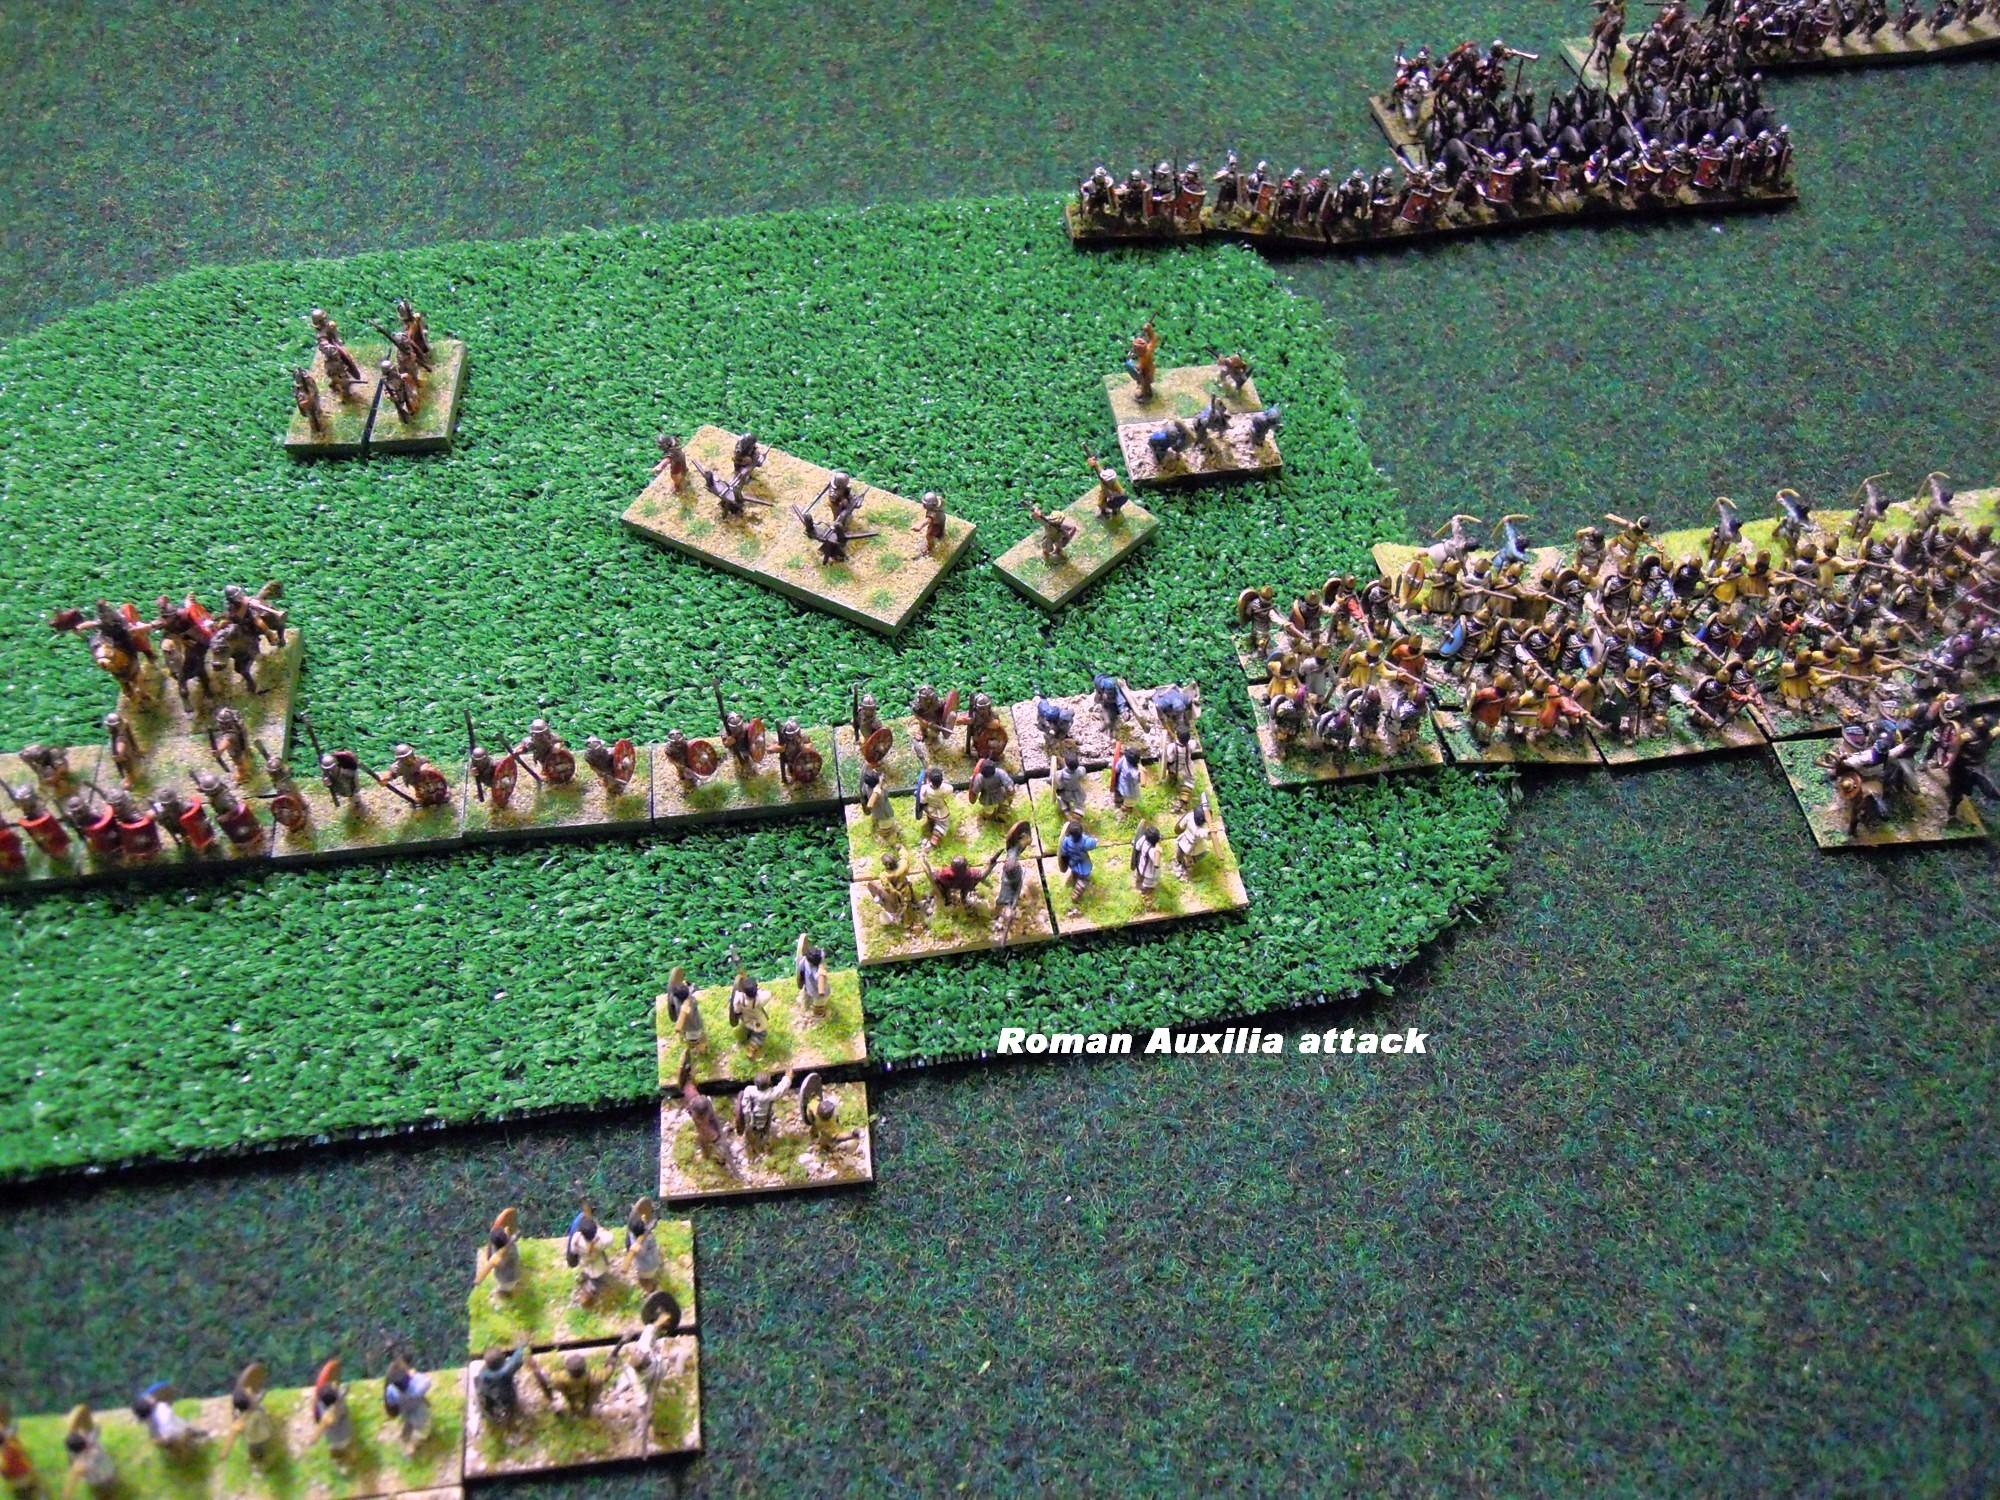
The roman was aggressive, and charged first to gain room
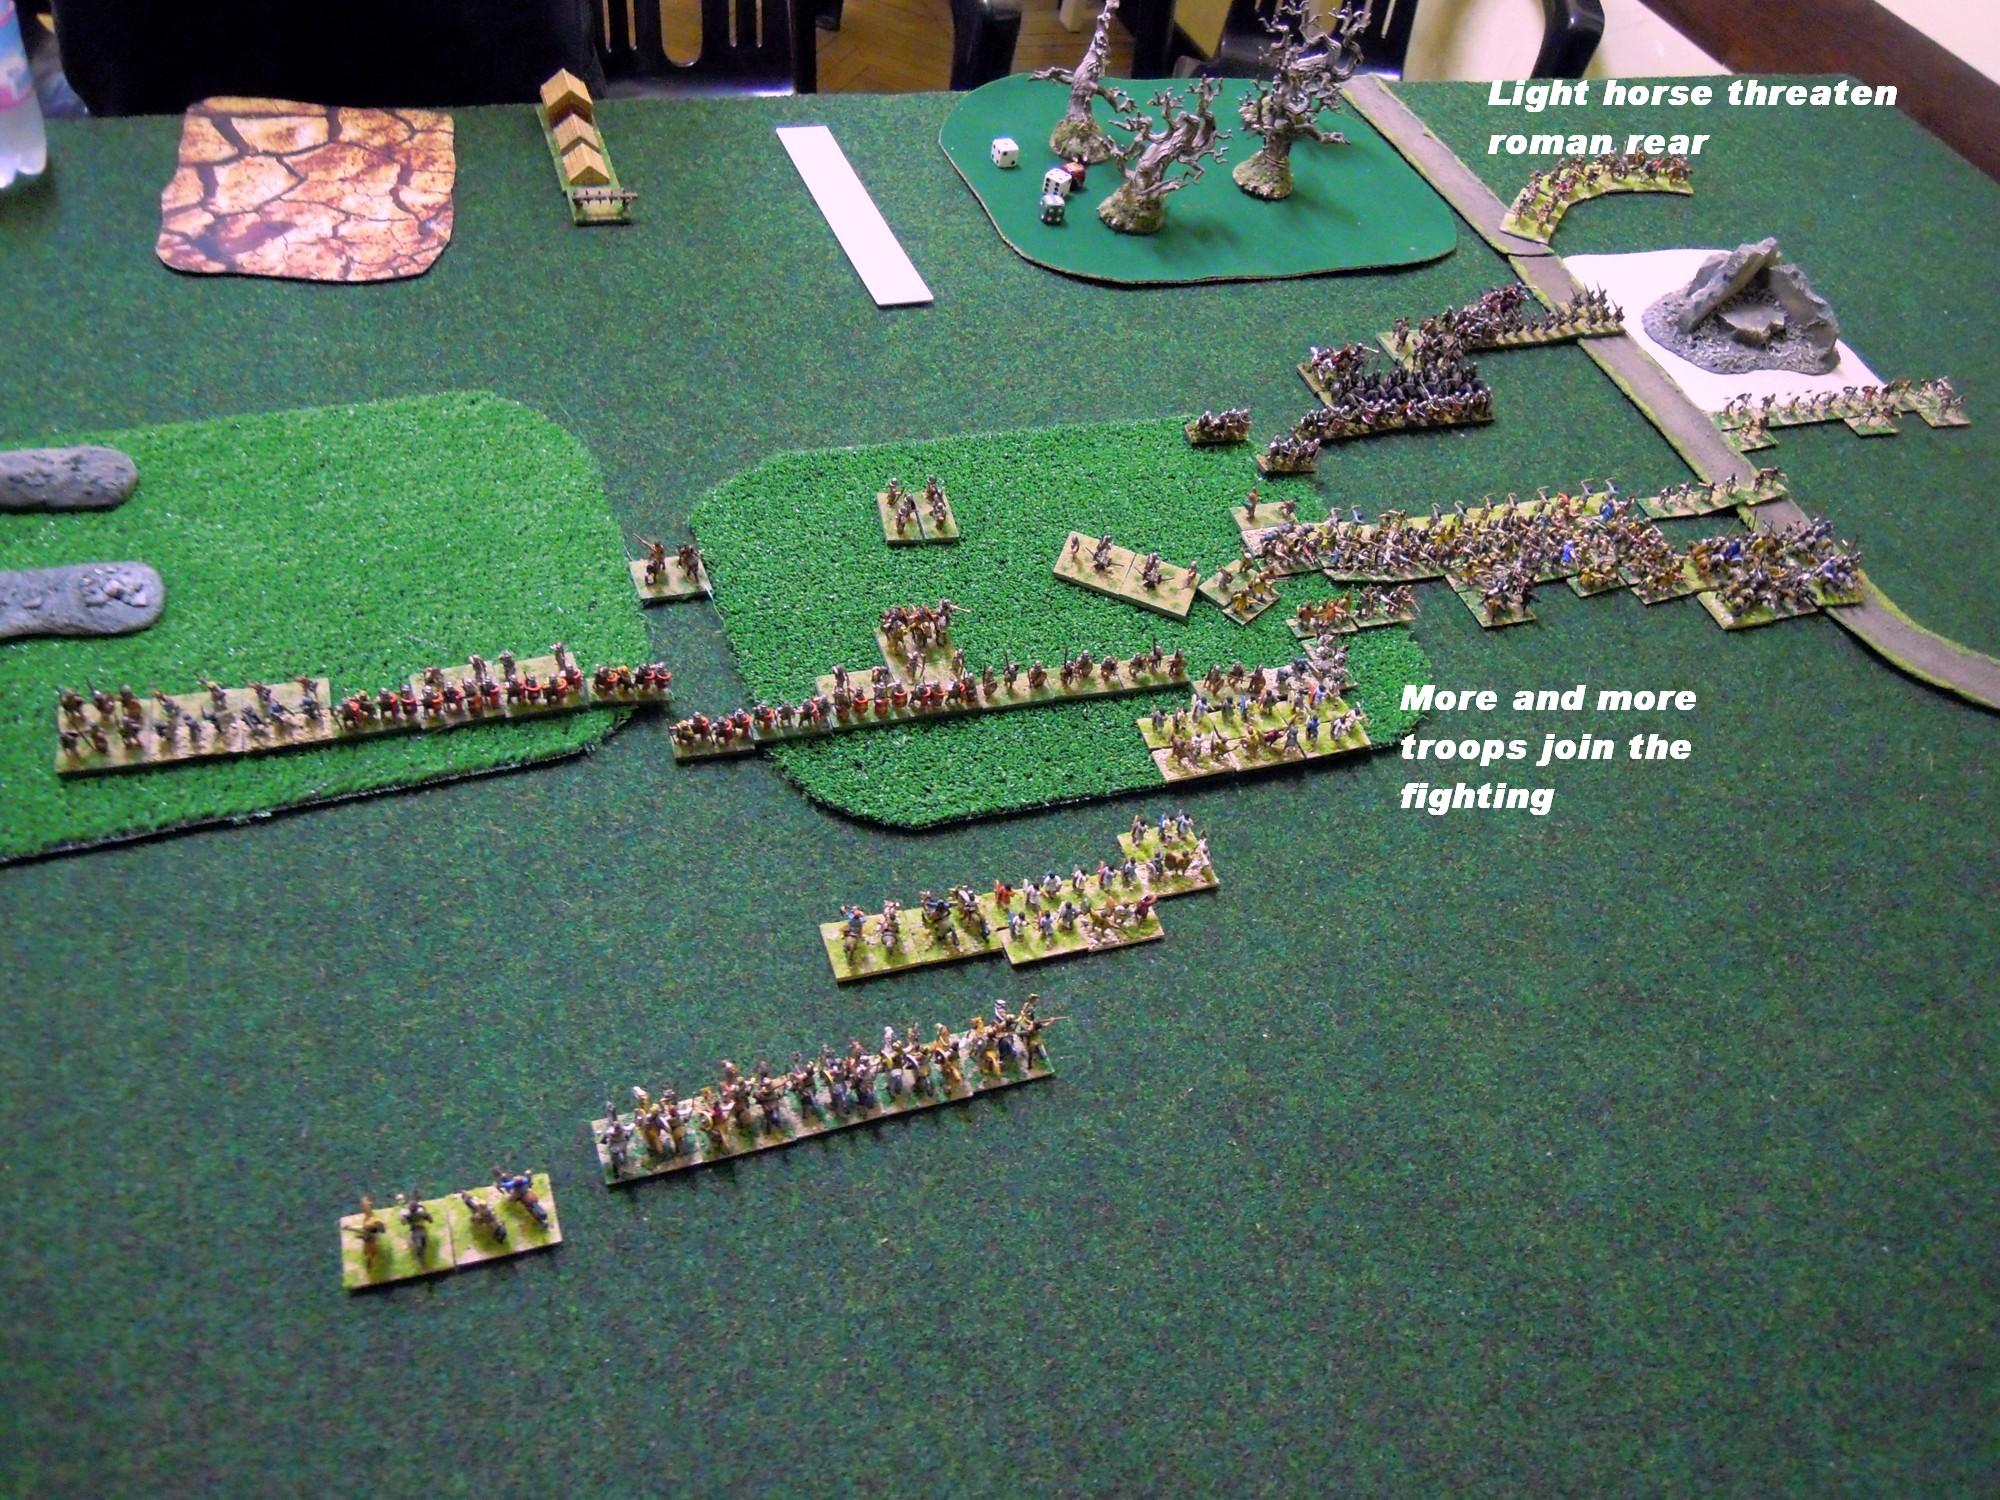
I followed my plan and put my troops in a good tactical position on the right. I was not able later to exploit the good position, because my CinC corps rolled extremely low pips. The Romans had excellent pips for several turns, and were able to manouver the BdS out of the way from Wb columns, and to advance with BdX facing Sarmatians
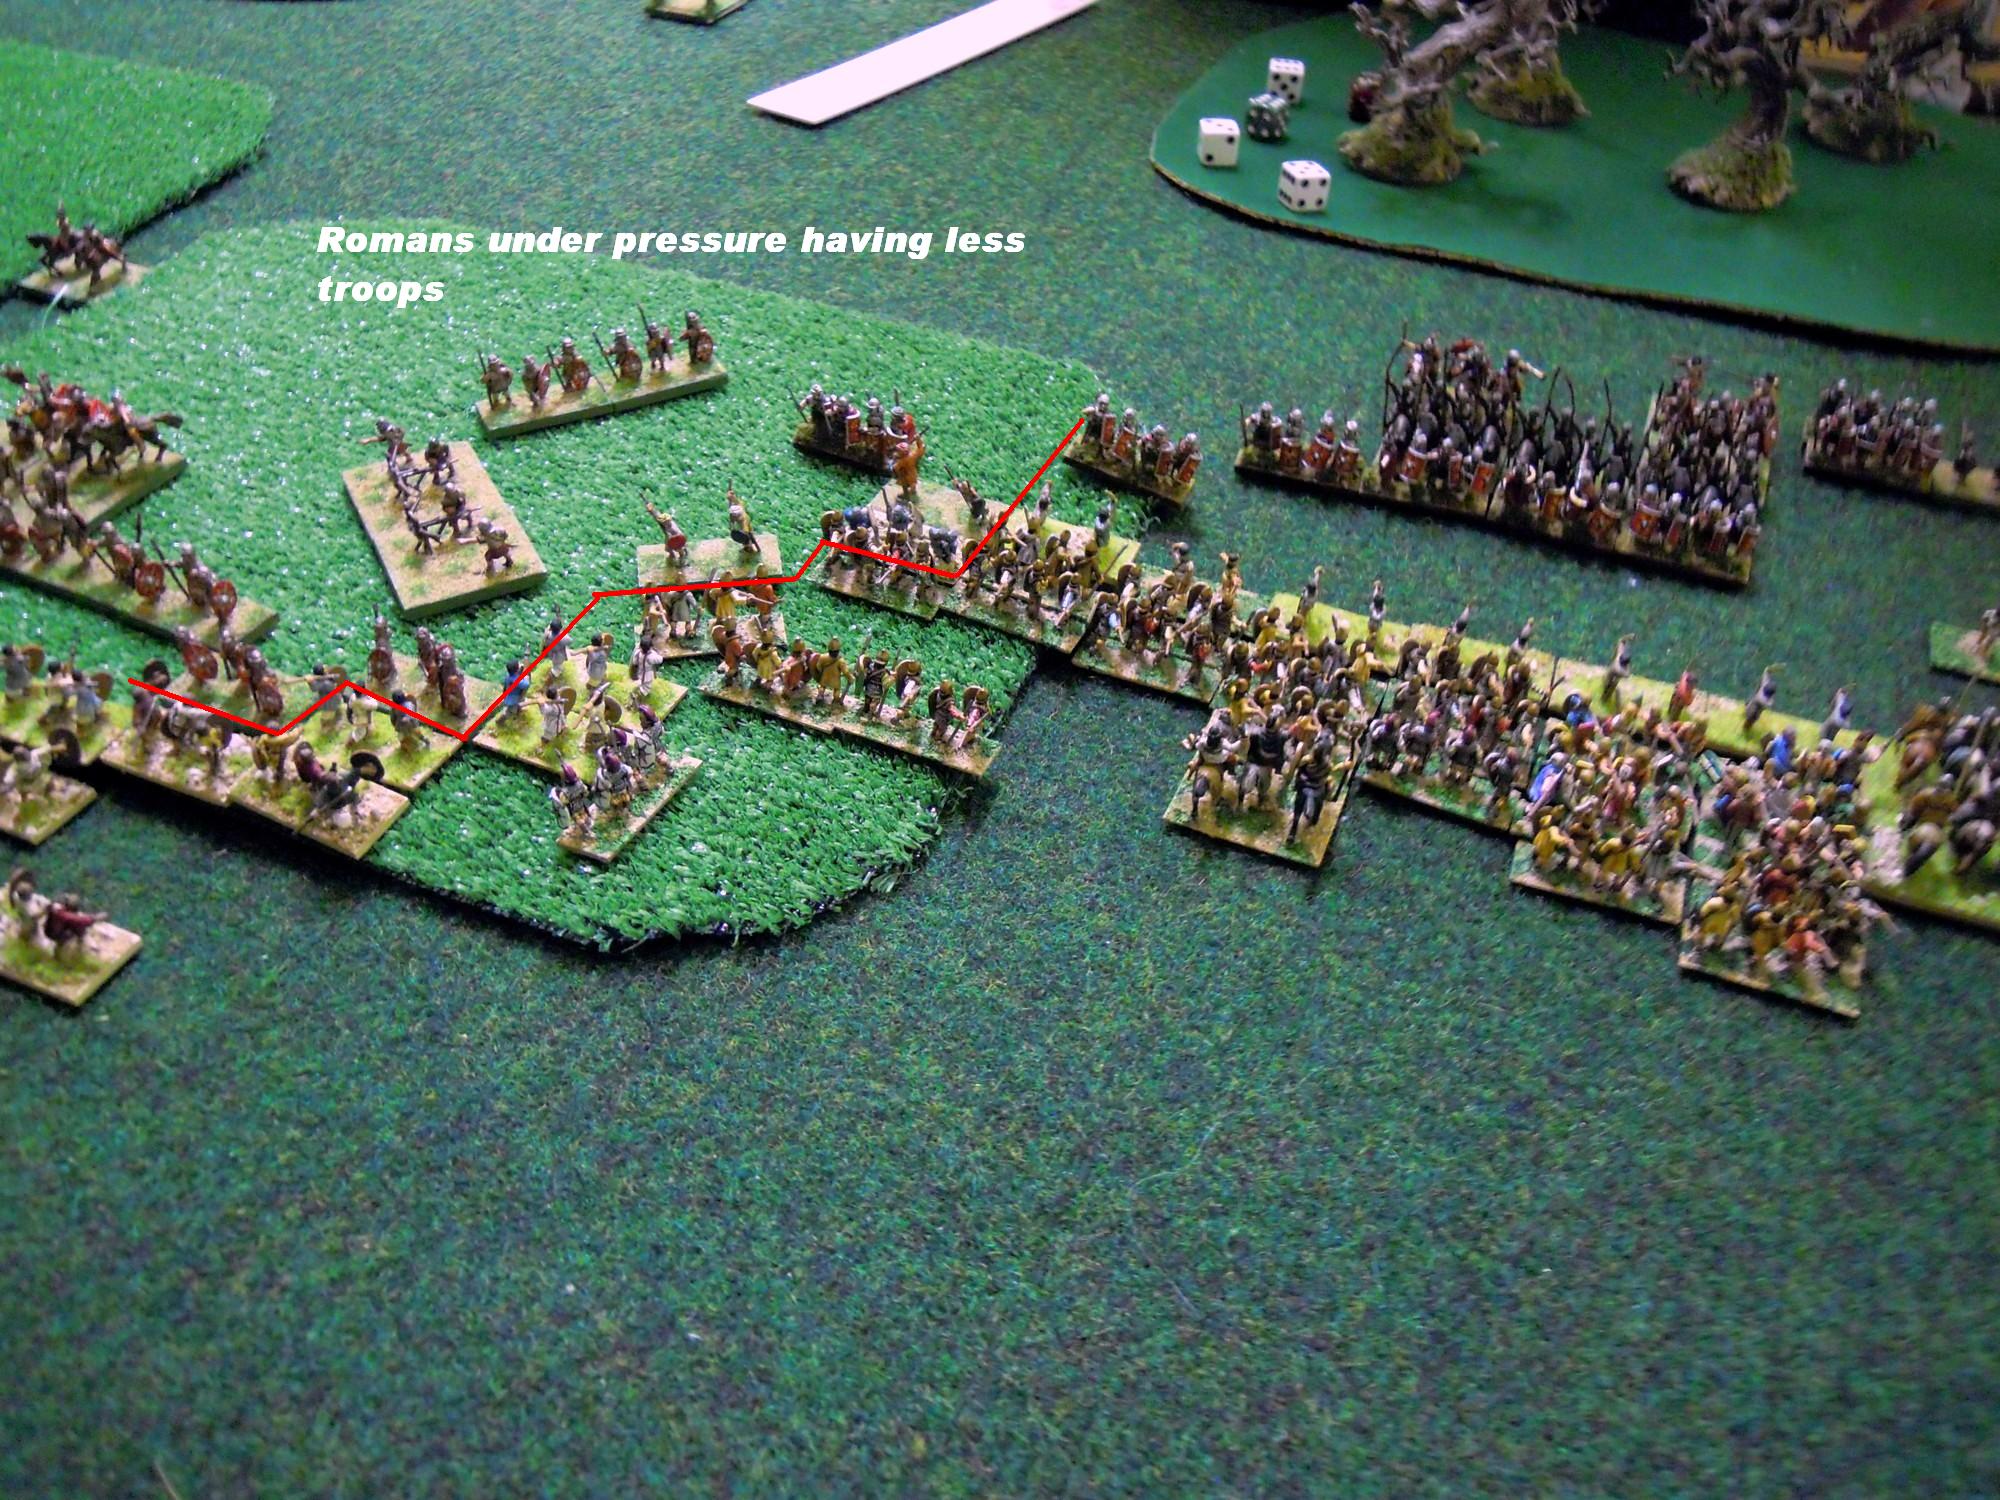
The combat balance on the rocky hill tipped in Mithridatic favour. RAxO didn't held for long facing more and better troops.
The combat on the rocky hill was going badly for the Roman, that decided to charge with BdS and KnX before risking to have the line rolled up. The BdX advanced to engage the Sarmatians, screened by skirmishers
After a couple of rounds of combat, the romans losses mounted. The right portion of the rocky hill was in Mithridatic hands, and from there the pretorian flank was attacked. Romans manouvered their reserve to cope with this new threat.
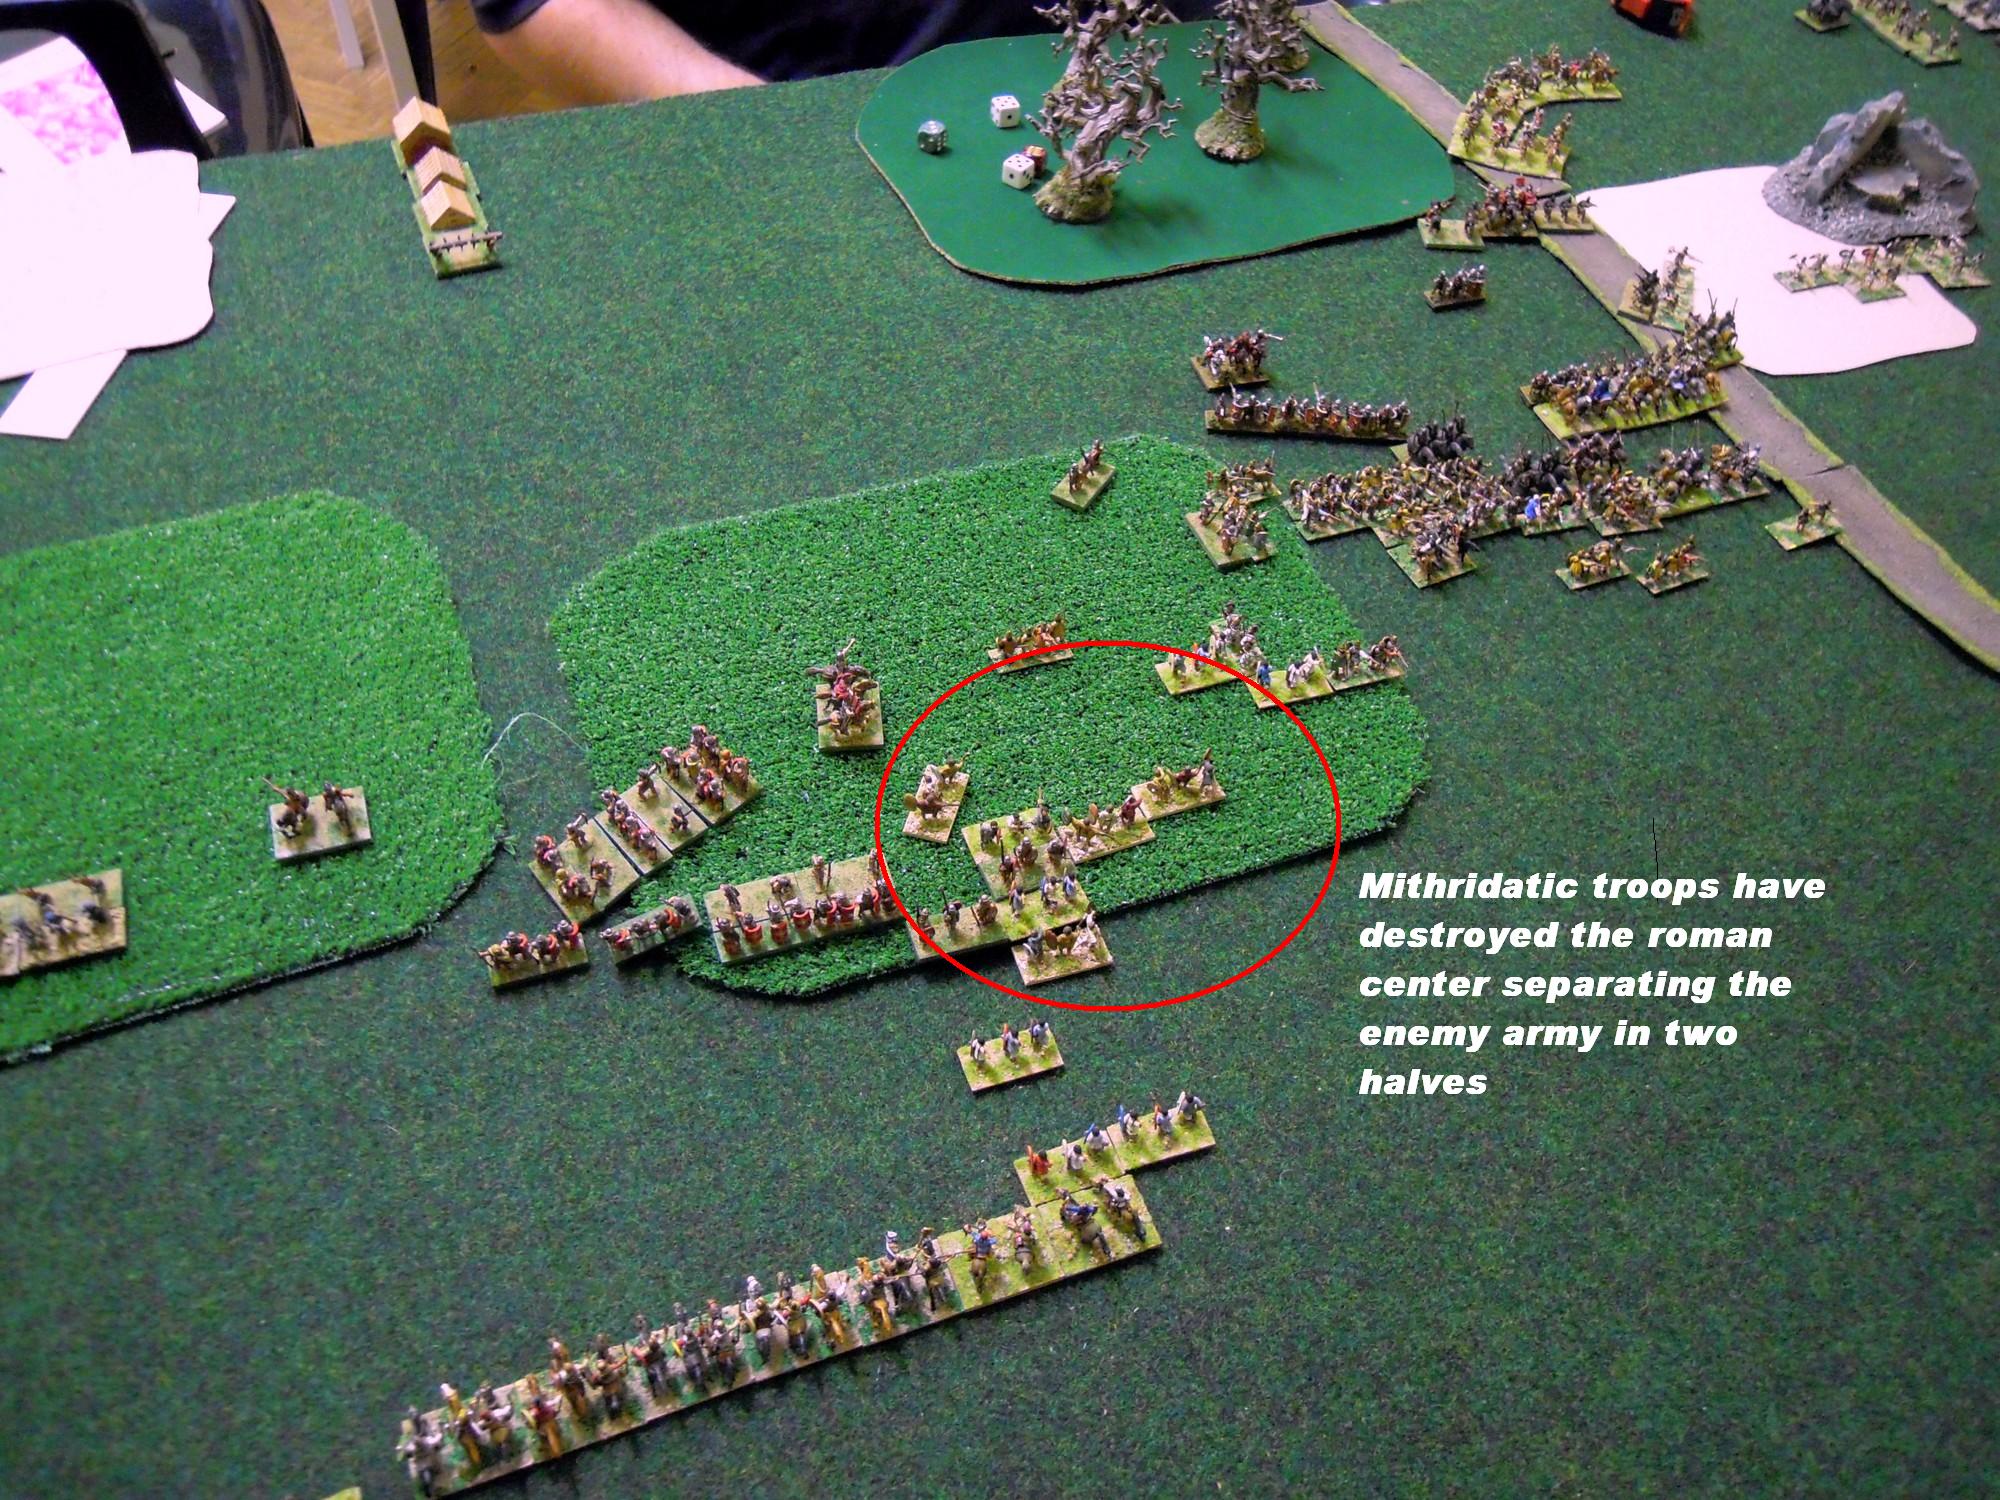
This picture show how the roman army was cut in two parts. The unengaged roman infantry on the left wing is sent to try to restore the situation. Again Mithridates could not exploit the good position having very low pips for several turns in a row and the roman skillfully saved his engaged corps

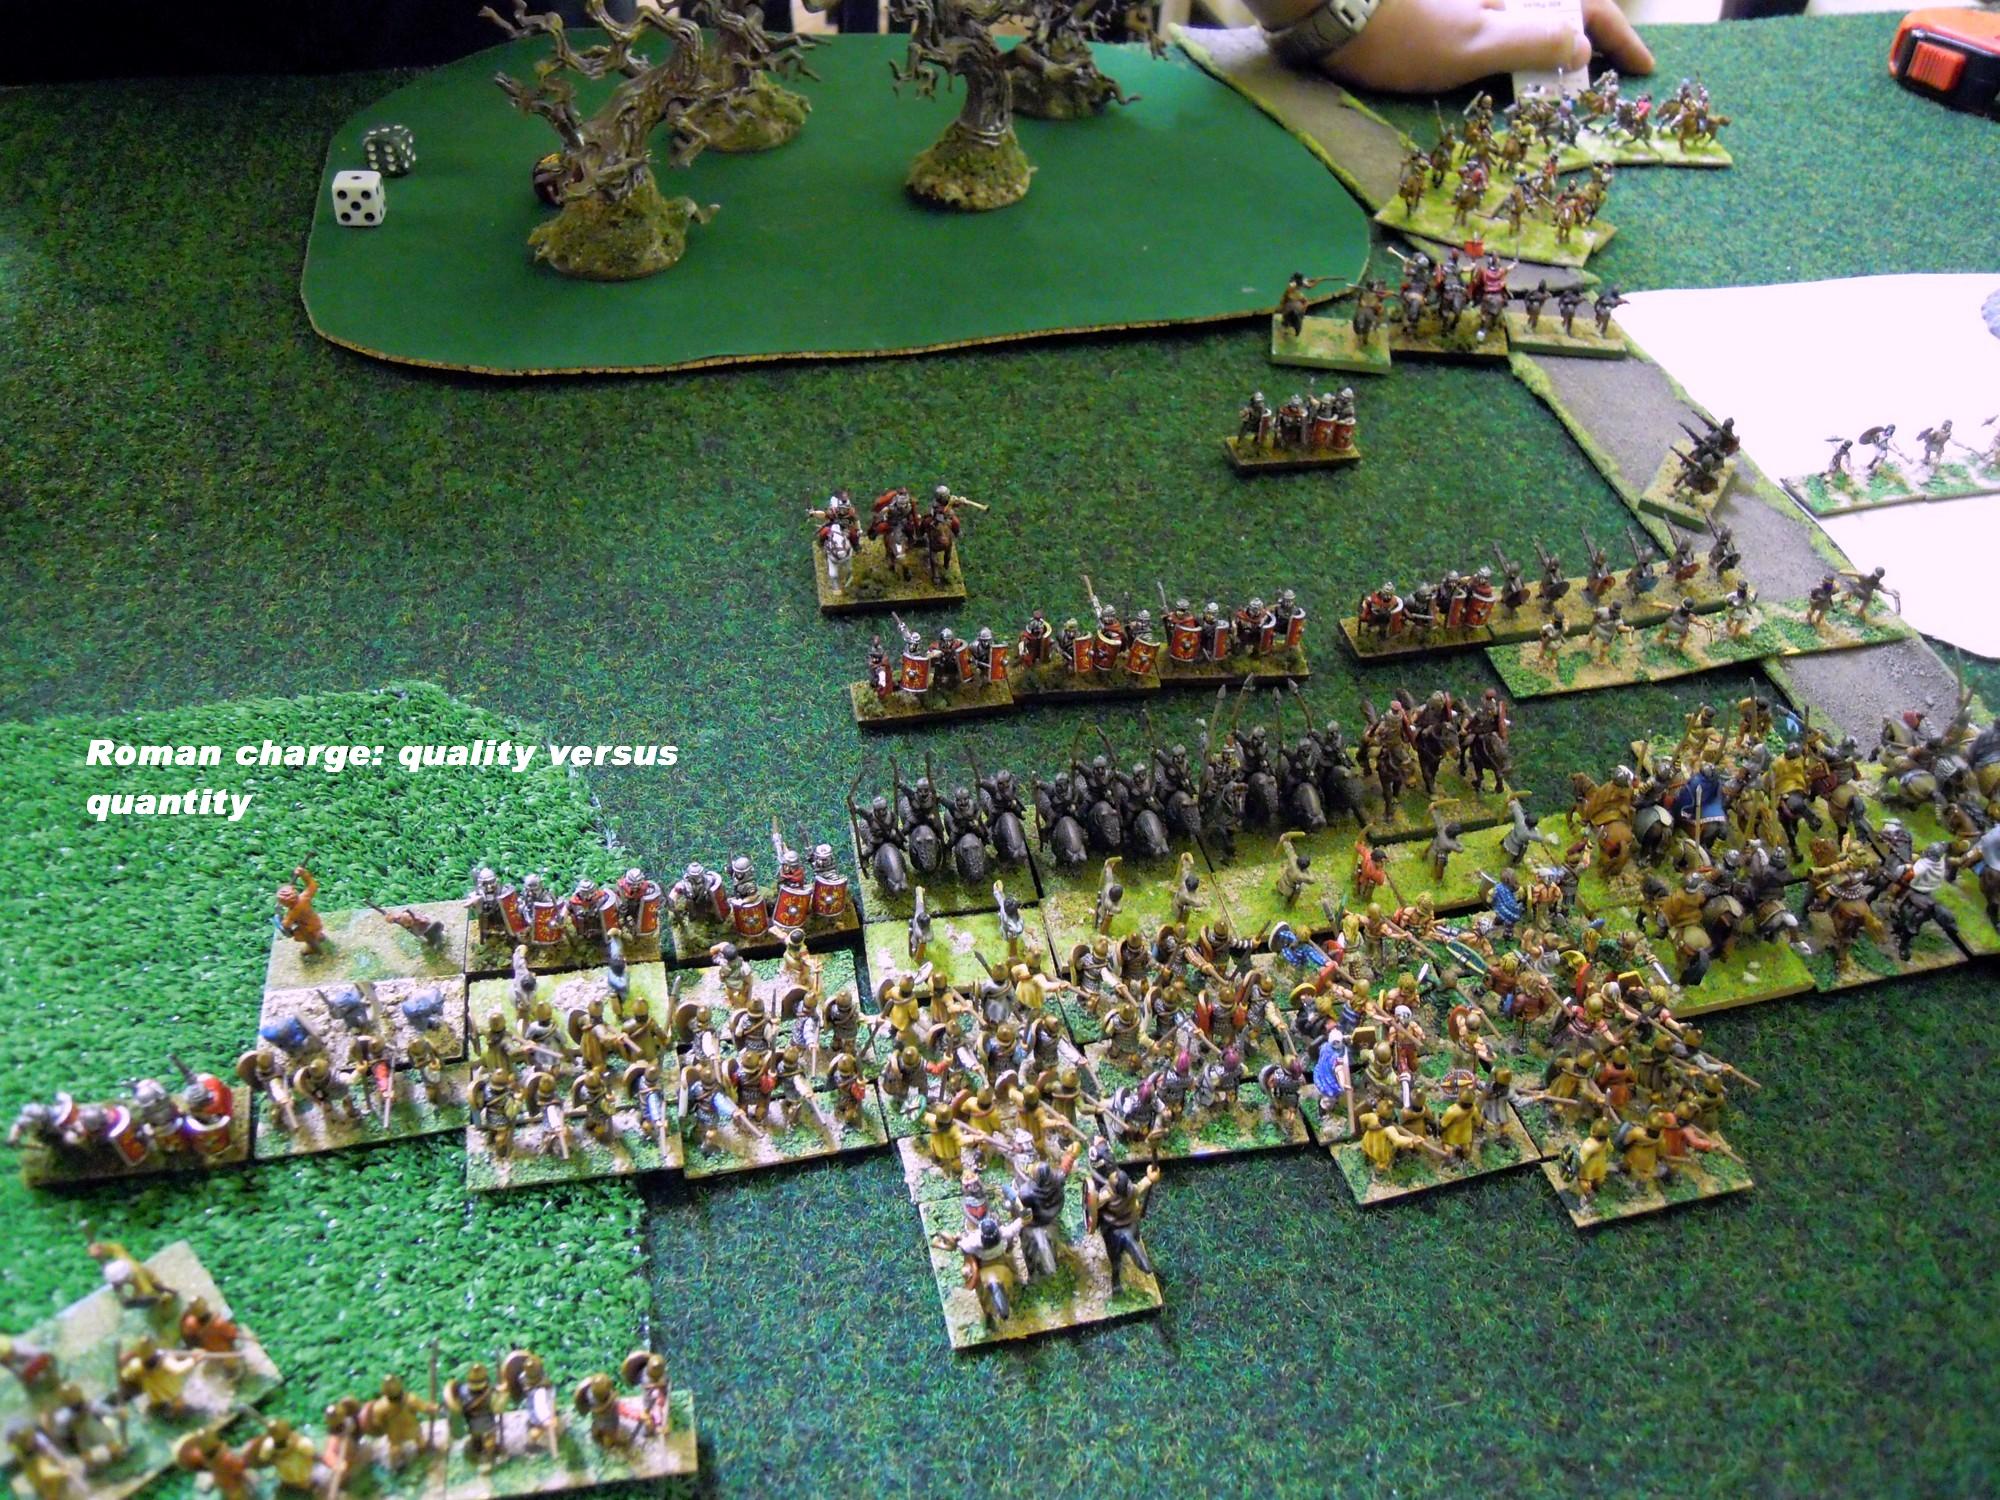
At this point of the battle, the roman had sever casualties on all three corps, while the mithridatic infantry corps was near the dishearting point. Sarmatians charged enemy BdX to kill the few elements needed to break the corps and the army. The charge went badly, with two KnF lost for no gain.
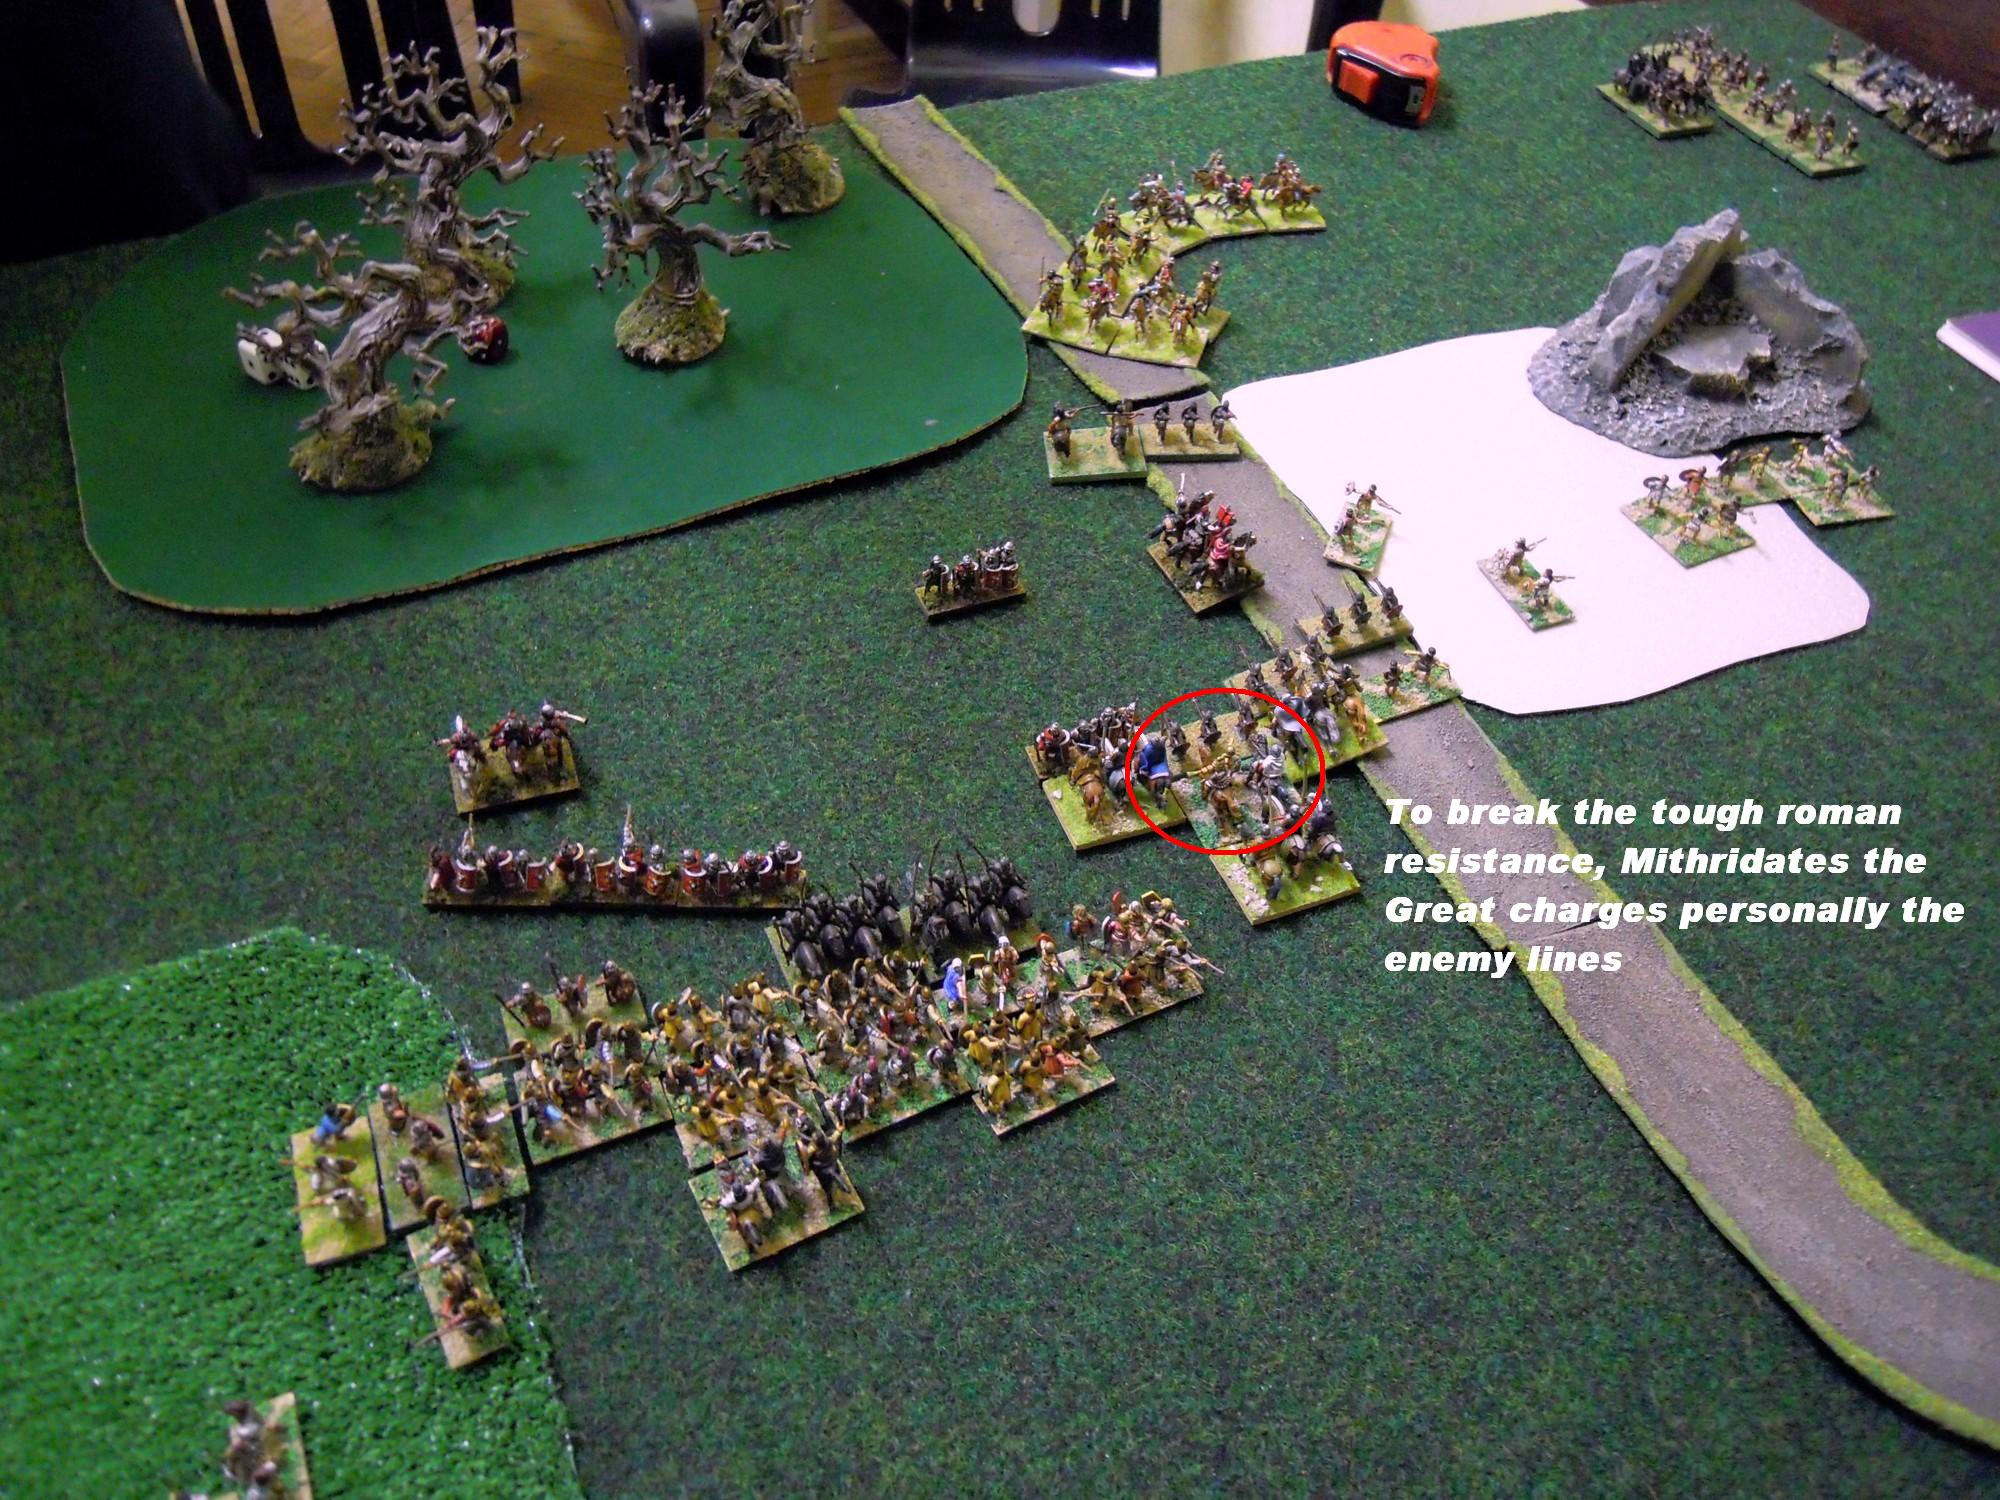
This was a crisis moment, and Mithridates charged personally the enemy. His gallant example put new vigor in sarmatians and this time the roman yelded
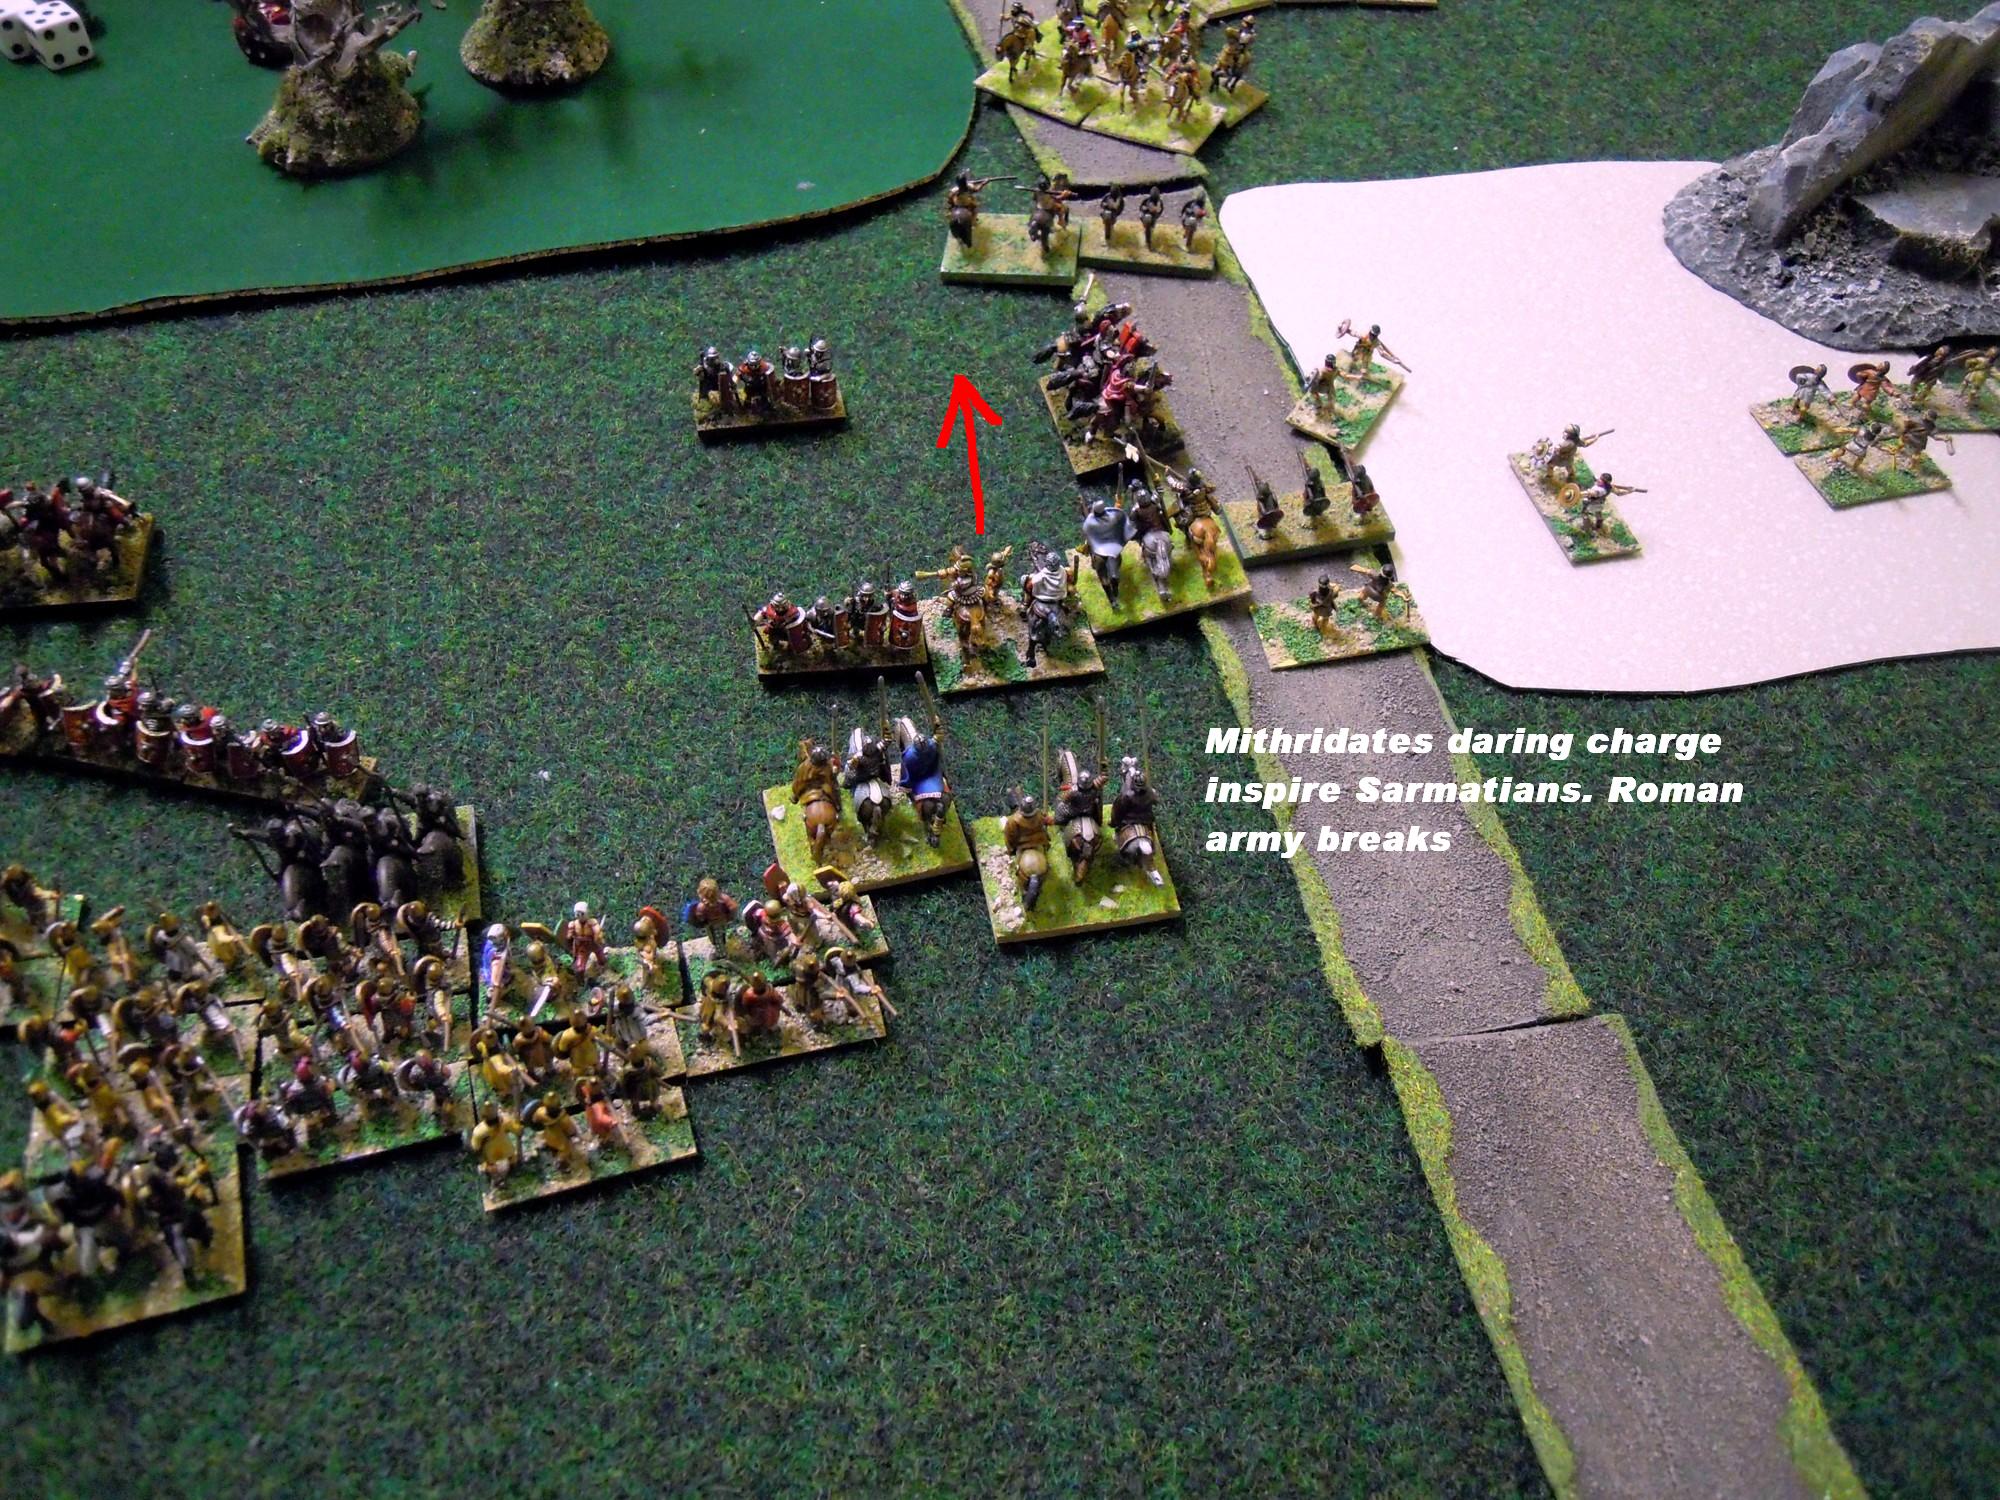
This attack decided the battle, with roman pretorian corps breaking and setting the whole roman army in rout. 23-2 for Mithridatic
I was very happy of this game. The army behaved well, even lacking pips to exploit the opportunities combat presented. I never had the pips to use my Lh in the rear of the roman army, or the PsS threatening the right flank. Once I pierced the roman center, again the winning corps stopped advancing. Neverless, the big corps were able to survive tough combat. Often I decided to pursuit enemy to keep the contact and do not need pips to fight. The Sarmatians were kept as reserve to deliver the decisive charge. This put a lot of pressure on the infantry center, that lost 7,5 ME. There I made a mistake, losing 4 PsO screening the RBdI, when in the end I preferred to be charged by KnX. A waste of troops that could cost me dearly.